Designing a Destination Wedding Invitation Brochure

Destination Wedding InviteIf you’ve ever planned a destination wedding or know someone who has, you know exactly what I’m talking about when I say what a pain it is to find the perfect wedding invitation. You might find designs adorned with pineapples or graphic depictions of a passport but those graphics alone don’t tell your guests much more than they’re going somewhere. In addition to the pineapple, you’ll also be expected to include 17 other invitation inserts, velum or otherwise, that entail hotel and air information, a list of events and anything else under the sun your guests (some well traveled and others who have never crossed the state line) are curious to know.

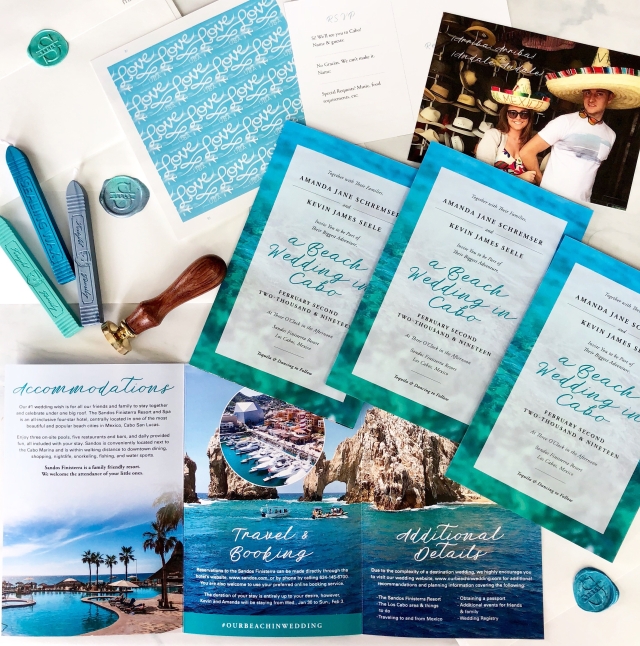
I didn’t want a pineapple. I didn’t want the cliche passport with our wedding date as the traveler number. I especially didn’t want the 17 inserts. I wanted a descriptive brochure outlining the adventure we had planned for our guests and a design that even the Four Seasons would commend me for.

Instead of wasting anymore time browsing Pinterest or Etsy for overly done destination invites, I instead starting comparing travel brochures against one another, paying special attention to the types of information they highlighted and the imagery they used. I didn’t want an invite, I wanted a wedding brochure!

I spent the next few days developing my content, writing down the language and working with my resort, Sandos Finisterra, for photography. I created a content outline and was able to identify that I needed the following information sections and therefore 6 brochure panels:

The Invitation (front panel)
Accommodations
Itinerary
Travel & Booking
All Inclusive Details
Additional Details

Once I laid out the content with each brochure panel, I enlisted Amy Goldsmith with AEG design to help me with the graphic work and help me construct the design I was envisioning. The end result was something magical and a destination wedding concept I had never seen before: A Destination Wedding Invite Brochure. I was (I am!) ecstatic!

In addition to the brochure, we included RSVP postcards (less postage cost than a return card with envelope) and added a wax seal stamp to our guests’ envelopes. I will tell you, if you’ve never done the whole wax seal thing before, just know what you’re getting yourself into before you start. It was (eventually) fun and they turned out beautiful, but MAN was it a ton of work with a major learning curve. We purchased our personalized “S” seal on Etsy and ocean colored wax set from Amazon.

For those of you hoping to create similar for your future destination wedding, don’t hesitate to reach out to Amy Goldsmith with AEG design. She’ll treat you right and does amazing work, clearly!

Falling in Love with Chalk Paint

Chalk Paint Dresser

I’ve wanted to paint something with chalk paint about as long as I’ve had this dresser–a very long time. I constantly see on Pinterest and other DIY type sites, darling little accent pieces with shabby chic flare.

Refinishing furniture, or at least the intention to refinish furniture, is something I’ve always been passionate about. I’m always looking for the perfect furniture find, even if I have no place for it–and living in our little beach condo, we certainly have no place for it. I’m an advocate when it comes to making an original new again, whether it be an old steamer truck, a brick colonial or my buffet pictured here. I’ll take the time to give the real deal a little love any day over something in a box from Ikea.

So back to chalk paint. Oh my goodness I’m in love. White Chalk Paint
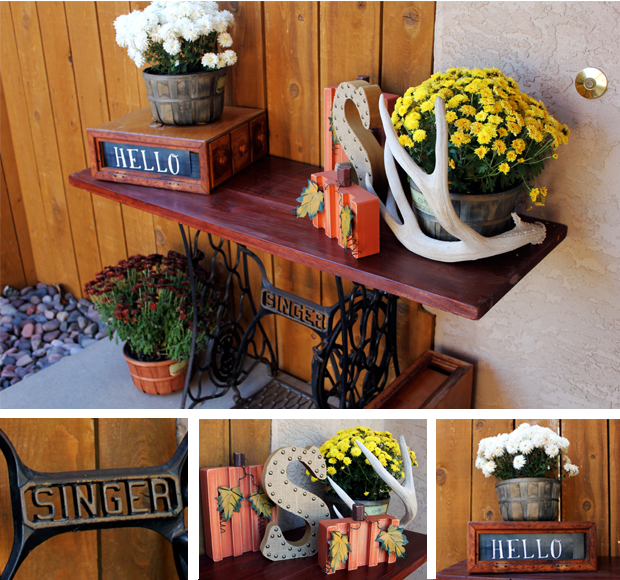
One pint of Annie Sloans, clear wax and a few new pieces of hardware and I had a brand new dresser. All in, dresser included, I spent about $125 on this little DIY weekend project. Oh, and the best part, you don’t even have to sand anything. That’s right, and I repeat, no sanding necessary!

There are so many different ways to skin a cat when it comes to chalk paint and wax. Every instruction I read/watched was slightly different from one another. I am confident your results will be perfect which ever you choose to follow. Both My Passion For Decor and The Thinking Closet do a great job if you’re looking for some application tips!

I was between White and Provence (I need to keep my beachy cottage look going after all) but here were the beautiful pieces that helped give me my inspiration. Certainly feel free to share your chalk paint projects and inspiration. I’m sure it’s only a matter of time before I’m on the hunt for a new furniture piece!

Chalk Paint Dresser Inspiration


Left to Right:  Lily Pad Cottage  |  Antique Restoration  |  The Painted Drawer

My Little Hand-Painted Globe

Hand Painted Globe
Little hand-painted globes have been popping up everywhere you look. Pinterest. Etsy. Antropologie. And for good reason… they’re adorable!

I purchased a (rather hideous) orange globe from Home Goods ($25) about six months ago with the intent to turn it into something creative of my own. Finally, a weekend to myself, I broke out the paint brushes (and the globe that I had been storing in the trunk of my car) and got to work.

Before and after hand-painted globe

What you need:

A globe (I recommend Home Goods, TJ Maxx or Ebay)
Your favorite acrylic paints
Paint brushes
A black sharpie (optional for outlining)

All in the project ran me about $35 and a good morning’s worth of time. For inspiration, I looked up “hand painted globes” on Pinterest to better visualize the style I was after. After I was done painting the globe, I added a little custom personalization and added little outlined hearts to all of the places Kevin and I have traveled to. I cannot wait to keep updating our little diy world!

Globes that inspired me:
Inspiring hand-painted globe

Porch Perfect – Singer Sewing Treadle Table

Singer Sewing Treadle Table

Fixing up an old singer sewing treadle, and turning it into a more functional table, has always been on my list of things to do. I love the idea of taking an antique, something previously loved with history, and turning into a more modern, purposeful piece.

Finding Your Sewing Treadle
Finding your treadle base is the most important part of creating your table–after all, you can’t make a sewing treadle table without the actual treadle. Treadles are no stranger to swapmeets, garage sales, estate auctions and even ebay. Also, you’ll have a lot easier time finding these across the east coast and Midwest–trust me on this one! How much you want to spend and the condition of the base is completely up to you. I’m always out for a deal and was quite happy with a 1920s Singer I found on Craigslist for $99 with free delivery.

Items you’ll need to make your own table:Table Before After
Sewing treadle base (with or without the original wood top/sewing machine portion)
Wood plank for table top
Flathead screwdriver
Wood stain – you chose the color!
Polyurethane
Old rags
Paint Brush
Drill
Screws

Removing The Original Top From the Base
Now that you have your table, the first thing you’re going to have to do is carefully remove the original sewing machine top from the base. I say remove carefully, because I think it is important to keep intact the top portion as well–even if you personally don’t want it, donate it. It is a piece of history after all, and someone will certainly treasure it!

Flip the table on its head so your treadle base has it’s legs up in the air. Using your flathead screwdriver, you will need to separate the base from the table top by unscrewing it in four places. There is a lot going on with the table top, so finding these screw ins may be tricky to find. See the arrows on image right to see where the screws that need unscrewing are located. Note: These screws have been holding tight for a 100 years, sometimes even longer! Lefty loosie elbow grease will be required to pop these bad boys out.

Now that the screws are out, you should be able to gently pull free the treadle base from the top. You may need to hold the top down and wiggle the base a bit to get it to come apart. Once your base is free, we recommend a good treadle cleaning. Soap and water will do wonders for your treadle base.

Creating Your Table Top
When I envisioned my treadle table, I pictured a rustic wood that my holiday patio decorations would look adorable atop. But you don’t necessarily have to use wood. I’ve seen glass, granite and even concrete. Chose whatever matches the rest of your home décor or in my circumstance, your holiday knick-knacks. For this how-to purpose, we’re going to stick with wood.

I was originally going to take a bunch of old barn wood and piece it together to make something unique, but while buying my stain at the local hardware store, I noticed a pre-cut slab in the exact size I was wanting. For only $30, I was much happier with this work-free substitute!

For a wood top, sanding is going to be involved. Boo-I know. I’m lazy so I start with a low grade sand paper (60-100) removing the rough top layer, and then finish the job with a 220 grit fine sand paper, giving it the smoothness you’re looking for.

Once sanded down, you’re good to stain. Chose the stain that works best for you and follow the directions on the container. Generally you’ll need one or two coats and plan on drying time, between coats and for the final dry. You’ll want to let it dry completely before applying your top coat. Apply your polyurethane and sand as directed.

Fastening Your Treadle Base to Your New Top
Once your table top has been stained, clear coated and dried, you’re ready to attach your table top to your base. Take your newly stained table top and lay it flat on the ground, stained side down. Take your treadle, flip it over so the legs are pointed up, and place it atop your wood plank. Remember the screws you had to remove to pull apart your treadle from the original top? Well, those holes, where the screws used to be on your treadle, are going to be your new best friend. Align the treadle exactly where you’d like it with the table top, and using the screw hold, mark with a pencil on your table top where the holes are located. You are going to use those four pencil marks as your drill points. If you’re lucky and the screws you pulled from the sewing machine are in good shape, you’ll be able to repurpose them as the screws you’re going to use to fasten your table top to your treadle. Drill your holes in your pencil marked spots and then use your screw driver to drive the screws into your treadle base. Tighten washers to the ends of your screws so your top holds in place, making it stable. Your table top should now be securely fastened to your treadle and shouldn’t wiggle or wobble. You want a nice, secure fit!

Patio Perfect

Patio Furniture

When Leonardo Dicaprio noted in Inception that an “idea is like a virus,” he was right. This concept, tied to the determination of a woman with a design project and a credit card, is an understatement.

Before & After

Randomly, I decided that Kevin and I needed a new patio set. Though we were doing just fine without one, I had convinced myself we couldn’t go another weekend without one. Not wanting to upset his woman and her virus, Kevin too decided he was convinced. I browsed online. I perused stores. I flipped through catalogs. I was obsessed at finding the perfect patio arrangement.

I decided on teak—a certain color of teak that would seat at least six. Preferably, mission-style teak with a particular deep-rich-red stain that sat six while accompanying a matching bench. Let’s just say, I knew exactly what I wanted and I was going to get it.

Since we weren’t about to spend the two grand it was going to cost to purchase a new set, I spent weeks patrolling Craigslist for exactly what I desired. Finally, she appeared. A two-year old World Market teak beauty with matching Pottery Barn Umbrella, for the bargain price of $300. She needed obvious love and I was going to give it to her.

Holy Hell. Have you ever refinished something? The idea (deadly virus in this case) sounds thrilling, and even fun, until you’re ten hours of sanding in, have a thrown out back and are inches away from killing your significant other…who, in their defense, has done most of the work anyway. If you ever want to test your love for someone and their love for you—sand something.

I’ve tackled furniture projects before, the occasional desk or dresser, but a table, four chairs and a bench included, takes a particularly patient individual. As beautiful as my patio set turned out, this project was certainly a life lesson. Though artistic, refinishing furniture is not for the faint of heart… nor the lazy. I am very proud of my lovely teak furniture and have enjoyed it immensely—I will for years. I do, however, imagine our next patio set will be store-bought, full priced and completely blood-sweat-and-tearless.

Products:
Navy/Teal Honeycomb Pillows: Etsy, Landofpillowsdotcom
Teal/White Geometric Seat Cushions: Target